Wednesday, October 10, 2012

The rain is falling and bees are flying

Last weekend I finished the garden beds that I started this past summer. It was more than a lot of work, but I am relatively pleased with the result. Taking advantage of new ideas like Hugelkulture, I am hopefully waiting for a bountiful harvest. Watch the video and follow me on YouTube!

Fall Garden Preparations!

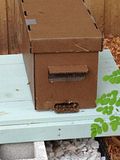
 Now with the bees... they are exponentially reproducing. This will be an important note to the beginner: Based on climate and season, when ordering equipment pay close attention to ventilation. I ordered the solid bottom board + a solid inner over. I had no idea that the bees would be adversely affected. The result has been more and more bees spending nights out on the landing board.

Night time temperatures do not drop much below 80 degrees F here in South Florida. Of course it will get chillier during the winter months, but as I am observing now, the bees have been forced to deal with this. Although it may seem normal to have bees outside the hive at night, to me I can feel that it is stressing to have the hive extremely hot and unventilated. Picture it this way. The bees belong in the hive or on the comb, why because it's their job to nurse, protect and ensure the progression of queen, brood, and the hive collectively. If they are not spending nights on the comb then they are not fulfilling an inherent characteristic. Their genetic desire to ensure the health and progress of the hive has led them to extreme vulnerability on the outside of the hive--free for the picking from night time visitors that may be insectivores.

The bees know this, but are willing to sacrifice a few for the survival of the whole. Why does temperature and ventilation matter-- goes back to the basics of the biology and environment required for reproduction to take place. Anyone who has hatched chicken eggs in an incubator, knows how vital steady temperatures are, so is moisture, and other factors. This is also true with bees, as the eggs and brood require certain conditions for survival.

The ending result is bees that become stressed, because of their inability to fulfill an instinctual role. So lesson learned... use the proper equipment for the right time of the year and the right part of the country/world you live in.

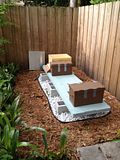
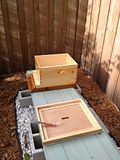
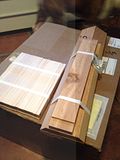
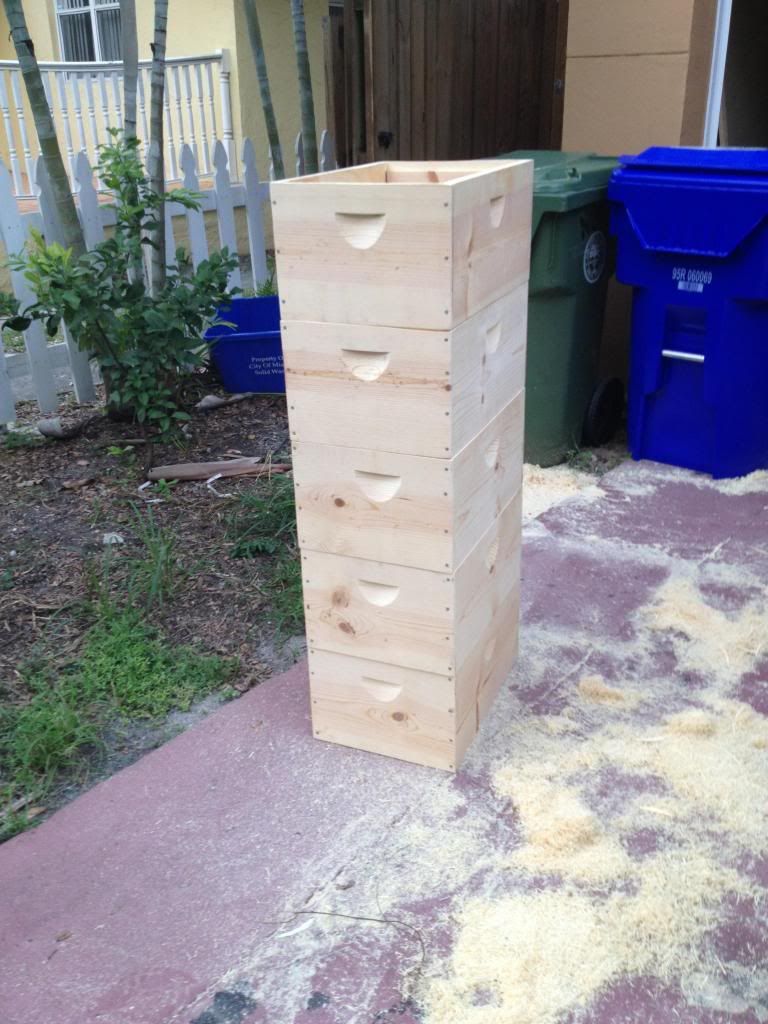
On a extremely positive note: thanks to a friend for the gift of a table saw, I am starting to build hives and getting quite good at the exact measurements. I posted a pic of some of my work completed on Saturday of this past week. Additionally, my father and I are meeting up this weekend in Stuart Florida to pickup our next nuc. These are a special strain with hygienic behavior. Updates to follow.....
Photobucket

Sunday, September 9, 2012

A less testie, positive update

It was definitely time to makes some changes. After experiencing the wrath of some aggressive bees, I realized that it would be much more beneficial to attempt and recognize the bees' needs. During this time, there are few flowers blooming in my neighborhood, and even though bees have been busy during the day, they had yet to draw out any more of the frames after three weeks. It is painfully obvious that what I was doing was just not working.

Last Monday for labor day, I echoed my dad's efforts in picking up some essential oils. I found them at Whole Foods. Following the Fatbeeman, who can be found online and on Youtube, offers several remedies for bee woes with natural essential oils. To combat mites to ramping up growth, there are ways to approach challenges in the bee cycle. This cycle can refer to either stage of hive development, bee health, or the seasonal availability of certain nutrients.

A preventative to mite infestation, I picked up some Wintergreen food grade oil. It rant me about $7.99 for a .5 mL bottle. For more anti-fungal and anti-bacterial defense I found some tea tree oil. There was a range of availability and I picked up the largest bottle I could find for $13.99. The last bottle I found was for lemongrass essential oil which is suppose to spur growth and honey flow instincts in the bees-- it was about $6.99 I believe for a .5 mL bottle.

Before I ordered the hive and got started, I did some research and so many stated that the plastic frames were the most beneficial. Additionally, the black foundation was suggested by several sources. The lady I picked the bees up from and another local beekeeper said they "hate the plastic" and that they may never draw it out. This worried me until I saw the drawing out of the black plastic today. I think this is due to the feeding that I did with the essential oils.

I would have pictures, but I am completely out of batteries. Will have to pick some up. They have been going threw a pint jar of the feed mixed 2-1 ratio of sugar to water and a drop of each of the three essential oils per day. Given that this has only led to two frames being drawn out on one side and about 30-40%, they are being filled with pollen which shows the queen is laying a lot.

While going through the frames I was able to see large worm like brood, eggs, and pollen. I wore my glasses to try and see better. I even spotted the queen for the first time. She was dragging her fat behind across the back of a frame. She scurried around and I was quite pleased to see her. The queen was not a pretty shade of any color, rather she was almost completely black, with splattered spots of yellow and orange. Next time I will mark her and take pictures.

I can conclude that one must take time to understand the bees if they intend to manage them. Even if they plan to be a simple beekeeper, one must provide what is needed until nature is able to provide that component of health. They argument that bees will adjust and provide for themselves, which is the "hands-off" method may lead to poor health, yields, or even the loss of a colony in times of dearth. The feeding may have also contributed to a taming of the bees, as well.

Saturday, September 1, 2012

Beehive... homestead update

It has been just over two weeks since I started beekeeping and so far it's been pretty good. I would say great; however, there are few blooms in my yard so I do not get to see the impact of my new addition. I do not see bees visiting the few blooms I do have in the garden either. The watermelon, Star Apple and Gefner Atemoya are going unpollinated. The two trees usually are pollinated by some kind of beetle, but I suppose bees could help.. eh. I will add that the cantaloupe melon that I planted randomly from seed had quite a few set fruit, but this dry heat is killing everything.

I am not a weather man, but I know Florida is suppose to be wet. Instead, this summer has consisted of two to three days of heavy rain 3-4 weeks dry. It's not what I am used to, and everything has suffered. The citrus tree leaves have been burned, same with many other plants. The fruiting vines have disintegrated. The raspberries, though in the shade, have take a beating, and withered down to brown fragile stalks.  And my garden beds are still solarizing. So it is difficult to name anything that I am excited about watching grow in the back. Even the seeds I started three weeks ago, disintegrated.. well the seedlings did. This is not something that can be controlled by more watering. This creates an ill-effect as the water seems to intensify the drying of the soil. It is as if the moisture magnifies the sun's intensity.

And back to the bees... The are getting testy. I will update later, but they seemed to be stressed about something, maybe will put some water out for them and see if they need some kind of moisture in the hive.... tough when there are no mentors willing to help a guy out. As for papa bear's hive, we did the transfer today( driving halfway each to meet up early in the morning.

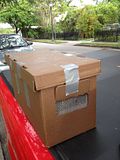
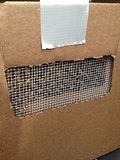
The closing off of his hive was almost impossible. Hundreds of bees were hanging on the entrance this morning at 5 AM in complete darkness let only by the rays of moonlight shining through the startfuit tree. Thinking it couldn't be done I reached down for some primal cave man courage and swiped them away from the entrance and plugged it immediately. I duct taped all the cracks and used ratchet tie-downs to secure all parts together. Driving over two hours early in the morning wasn't bad, but keeping the car cold as ice so not to over heat the bees, was numbing.

 After waking up every morning much earlier than I have been used to since I was a swimmer in college, is frying my conscience. I am ready to get these garden beds back together and start growing again. Despite some of these set backs I must say that I am extremely grateful for my good fortune and cannot express enough gratitude for the blessings I have been given. Everything I describe, all the successes and failures are a pleasure. I just hope I can keep my eyes, mind, and heart open to the lessons in each adventure that awaits me.

Monday, August 20, 2012

This should have been posted yesterday....

I had to make an emergency 8 frame hive for my dad's nuc. It looked like it would have be longer than a week before we could meet up, so they had to have a bigger home. The box, bottom board, and cover took me only about two-three hours to build and another few more to paint. Cost was $28 in wood from Home Depot. I had 1 1/4" Screws,  2 1/2" Screws, and some galvanized nails in the garage. Glue and paint was left over from another project.
Photobucket

I made a video of the entire Nuc transfer.. Check it out!


Now that I have put together my first BackYard Phenomena Video Subscribe and follow the journey toward sustainable living and food sovereignty!

Thursday, August 16, 2012

Starting with Bees

I picked up my first bees yesterday. I ordered two 5 frame nucs which is short for hive nucleus. It contains a starter hive with a queen, workers, brood, eggs, and whatever they have been building for a short while. I picked up one for me and my father (papa bear). He got me into this whole beekeeping thing, and after he got me interested, I have returned the favor by dragging him along.

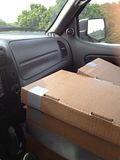
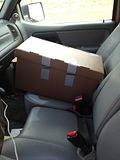
I had to drive north to Davie, Florida which is sort of an ag area. My truck is a single cab ranger, which made it difficult to fit the two nucs inside next to me... yes inside with me while driving! Ahhh. The reason being is for the air-conditioning. They can easily over heat. What a scary thought to think them all flying outside of the box while going 70 MPH on I-75.

It took me about an hour to get home. One bee managed to free itself from the box while I was driving and attempted to exit through the passenger window. I thought, "this is the craziest thing I've ever done. I can't believe I am doing this." When I arrived home, I exited my side and then slowly opened to passenger door. The escapee flew up, spiraled, and then took off.

I managed to get home about the time my wife pulled up in which I notified her that the bees were in the truck. I placed my hive body, stand, covers and all in the appropriate place that I have been preparing for weeks and grabbed my bee suit. My wife reviewed the steps to CPR and how to call for emergency help as I suited up and put my boots on. It wasn't exactly what I needed to hear before I took a box of thousands of bees and forced them into a new home.

God bee suits are hot. I cut through and peeled back the tape that seeled the box and opened the lid. Oh man, they flew everywhere. There I stood, in a flurry of bees, when before I would have ran at the sound of a faint buzz. I began to slowly move frame by frame transferring from nuc to hive box. I was sweating like a pig, with a big canvas material jacket on and a screened veil distorting my vision. I still couldn't believe what I was doing.

After placing the cover back on to the hive, I moved over to my dad's nuc to open the entrance at least (our plan is to meet up to, since he lives about 4 hours away on the gulf coast). As I squatted down, I felt a sharp pinch in the back of my calf. "Ouch!" I thought. "Ooooweee," I murmured. They got me! It was my first sting since I was a little kid and after about 30 seconds to a minute the heat, stinging, and sharp pain had subsided. It's funny that it took until the last thing I did, peeling back tape from an entrance and carelessly squatting to get stuck with a stinger. I scurried back into the house to take off my hot bee suit and peered outside out my job well done.

"Oh damn," I thought, I hadn't properly put the cover on the hive box and bees were curiously moving out of the hive.

I'll get that later this morning before work. I had enough excitement for one night. Check out my pics of the event!
Photobucket Photobucket Photobucket Photobucket Photobucket Photobucket Photobucket Photobucket Photobucket Photobucket Photobucket

Friday, August 3, 2012

Reaching out to open space

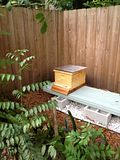
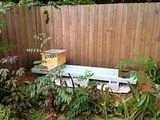
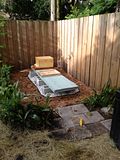
What does a guy have to do to get some bees around here? I've called, emailed, and beckoned towards a countless number of people. Every available starter hive or 5 frame nuc is 2-3 hours away. What is shocking to me is the lack of support from local beekeepers. No one is extending a palm to meet my outreached hand. This baffles me, just as I would readily help anyone who needed assistance or showed energy to get started in sustainable practices. Which caused me to ponder whether this is just my nature or is receiving even consultant assistance is a service that should be payed for? This becomes the essential question: Is what we are doing a service or a hobby/activity? I know that currently it is a hobby for me and perhaps it will turn into a business later down the road. I suppose if hobby beekeepers have this desire than they see no harm in charging a fee for helping or making a simple split of their hives. I am at a disadvantage during this time of year, when I can't order bees in the mail and have to start with an established colony. But I still don't think it should be this hard. It gives me time to get everything ready I suppose. And the location in my yard is looking awesome. I will post some pictures shortly. I am working on the stand where the hive and future hives will sit. On a side note. I have heard that Costco is selling out a certain model of solar panels for remarkably cheap. I have heard that there is a 220W panel for 179.99 but have only been able to find a 100W for 189.99 online. Maybe if you contact them you will be able to locate. Here's the link Costco Solar Panel

Tuesday, July 31, 2012

So Busy, do I have enough time???

I finally tore done the old coop. Like I stated before, it was huge. It would have made a better doll house than a coop. It wasn't meant to move or be placed on uneven ground. The backyard did not supply level sitting. As I've worked in the yard, the apparent slope has become more and more noticeable. This is strange to imagine in a flat Florida backyard. The poor structure was always titling. It finally came to a crash when moving it last. This prompted me to change the coop in the first place. The backyard was a complete mess for weeks. I am not a clean freak, but I do not like things being a mess. I cleaned it all up on Sunday and the additional 4 ft run for the chickens is ready to be placed. I put a coat of polyurethane on the beehive(am currently not a fan of the painted look, yesterday. I put the rest of the plastic sheets on the garden beds and secured it down. This is to solarize it for the month of August. There are so many Root Knot Nematodes in the soil. There was also a fair amount of Fusarium fungi that killed off all the tomatoes. I had to sacrifice quite a few plants, but they were covered in whiteflies anyway. For the Florida folks out there, we understand that little to nothing can withstand the heat, humidity and problems that come with the intense summers. Some may argue that it gets more hot elsewhere, and they may be correct, but add heat with moisture and you have quite the environment for the growth of unwanted fungi and bacteria. Bugs also thrive when plants are ailing. So after yesterdays work, I started to realize that the backyard is almost complete. When I put in the beehive area, which I'd like to have enough room for 3-4 eventually, the entire yard will either be planted or used for traffic. I have the rabbits and chickens, and would like to add quail again. I had a lot of quail previously but I couldn't secure the cages well enough and they were picked off by raccoons and opossums. I have such a small backyard, but have planted so many trees. I am really pleased with how things are turning out. The title to this post refers to having enough time to solarize, finish the beehive area, chicken run, and hanging rabbit cages before I have to go back to work. As a teacher, I get the summers to refuel and to reinvest time in sustainability.

Saturday, July 28, 2012

Work in Progress...

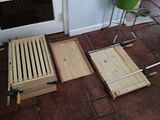
I read in a beekeeping book for new beekeepers that it is best to purchase a fully assembled hive. Siting that the construction of a hive is intricate, the author stated that it may take weeks to finish the frames, boards, and boxes for the novice. It really did take me until Thursday to take out the pieces an begin putting all the pieces together. Taking the information read in the book to heart, I figured I would work on the frames and work my way to the boxes over the next couple weeks. Armed with wood glue, nails, hammer, and a square(few others) I started on the first frame. Because I did most of my direction research via YouTube, I felt confident in what I was about to embark upon. I started with one frame just to test the waters, then employed an idea I saw a beekeeper utilize: gluing and assembling frames in rapid succession. By lining up the top bars parallel to one another, the side bars can be glued and the tightened in place. Quickly, the bottom bars can be glued in place. I begin doing 5 and more at a time until 20 had been glued and assembled. Then came the nailing. Each corner took two nails totaling 8 nailed per frame. I had purchased a precision hammer for the endeavor and it worked well. I was hesitant at first to order unassembled frames, since most seem to use a compressor and staple gun. I knew I was at a distinct disadvantage. Regardless, it took me about an hour or so to finish 20 deep size frames. By my calculations, the rest of the assembly project would only take several more hours. I had little experience growing up with tools and I may have hammered my first nail when I was 25. Neither was the mentorship there nor the opportunity. Unfortunately this has led to an extremely embarrassing hammer ability. It is a precise skill to be able to nail with precision, which I am slow to attain. There were plenty of bent nails in the building of the frames. I thought I was getting it down at times, but still made quite a few mistakes. Later that night, I took out the 20 medium sized frames and started again. I finished those within less than an hour. So I picked up the boxes and grabbed my 24" bar clamps. I had ordered 8 off eBay for around $40 for the project. The boxes were difficult to maintain square and it was increasingly frustrating that the boxes' seemed a bit bowed in places. I used a rubber mallet to pressure the finger joints together. With one blow I actually cracked the top of on. That this point, with a cracker side of the box and the joints not coming together flush I began to regret ordering an unassembled hive. I remedied the situation both glue and small frame nails. Looks like crap, but it isn't visible from the front. The clamps also came in handy with pulling in the bowed sides. By the nights end I had nailed and glued everything. The foundation for the frames was difficult to push into the grooves on the frames, but made a technique for both the deeps and mediums. The entire hive is completely assembled in my dining room awaiting sanding and painting. Overall, it was difficult, but it was an enjoyable experience. If you think you can hammer and glue, then I would suggest giving it a try. It totaled about 4 1/2 hours. It is almost time to start keeping some bees!

Tuesday, July 24, 2012

July 24, 2012

The summer season is winding down and its almost ready to start preparing for fall planting. Unfortunately, I had to redo a lot of things in the garden namely because of Fusarium wilt. There were entirely too many challenges that arose from a wetter than usual Spring season, which lead to very little harvesting. Despite this, I've redone most of the garden beds by raising and adding wood logs underneath. This is an attempt to try Hugelkulture. I am enthusiastic for the fall, in which I will be utilizing a deep mulching method and capitalizing on the solarization and composting that is taking place now. I hope to get to the building of the beehive later this week, as well. It has proved difficult to even get started this late in the year, as most bee packages are available only in the spring. Regardless I am told by members of Beesource.com that I can start anytime in Florida. I hope they are right, and even more hopeful that there are some mentors out there willing to take me under their wing.

Wednesday, July 18, 2012

BeeHive Arrived!

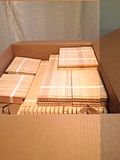
Just a quick note this morning: the bee boxes I ordered last week arrived. Completely unassembled and begging to be put together. That will have to wait until I finish the coop.


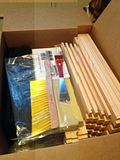
Boxes with Fram and TOols Hive Stand and Frame Bee Box Frames

Tuesday, July 17, 2012

Today's Venture

Today I am trying to finish the chicken coop. The first one I built was large, expensive and took months to complete. It was a grand master design, but once finished I felt like it was over done. With no prior construction or building experience, other than putting together puzzles, it proved a difficult task.

That was March of '11, and more than a year later, I am more confident in my skills. I've actually completed the majority, just need to add hardware cloth, hinge the doors, and paint. It is going to be quite a set-up. Originally there was a 5 x 3 ft coop, constructed to look like a house. a 12 ft run went off to the right. An additional 5 ft run was added to the left and a wire enclosure was put on the sides of the bottom so that they had a total of a 22 x 3 ft run. Though soundly built, it was an eye sore for me. Of course it was painted and everything matched. There was a method to the set-up, It was just too monstrous for my little urban lot.

With the new coop, I have scrapped the original coop, harvesting the screws, hinges, and wood paneling. I have done away with the side 5 ft run and another miniature 4 foot run connected to a long 8 ft piece made out of 2x3s. The top half of the 8 ft structure has been divided in half horizontally, since it was 4 ft high. Why I made it 4 ft high, I do not know; maybe so I could go inside. With the remaining structure I have put the cup on top of a 4 ft section.

All in all, it looks 100 % better in my mind. The lesson in building the coop for the first time and sequentially adding more and more run capacity through out the year was invaluable. Although it was an expensive endeavor, it took a lot of guts to rip it all down and start over again.

I feel that the there are at least two distinct lessons that have been learned and represented by the above description.

On a side note: I should be receiving my complete Beehive kit by this evening. This is an exciting endeavor that I will write about later!

Monday, July 16, 2012

The right time is today.

As I grab my cup of morning coffee and head out back to see the results of last night's rain and to ponder the challenges I will tackle for the day, I realize that now is the time. This motto is quintessentially a process of endeavor and success. No matter what stands before us, or perhaps if it is simply just an idea, the best time to start is now.

I recall the saying "The best time to plant an Oak tree was 20 years ago, the second best time is now." In retrospect, the best time is always when we first have the urge-- to follow our inner instincts and to react in a productive manner that is free of fear, hesitation and inhibition. However, the second best time is now.

This leads to a resurrection of this dialogue with life, regardless if there is an audience. Those who stumble upon these words out of desire, idea, or pure chance, I urge you to start... now. Join a local club, council, or organization. Invest in community and follow your instincts. If local communities are hard to find or non-existent, then join a broader community in the various forums of interest where support can be found. Check out the following: Beesource Forum for Beekeeping and even the highly populated BackYardChickens. Peruse posts, topics, or even join.

One final suggestion is to listen to the many available podcasts on sustainability. My favorite involves a little more but is run by Jack Spirko at TheSurvivalPodcast.

Remember the right time is now... today.